")

For organizations sending logs to multiple platforms or destinations, a telemetry pipeline is essential. Telemetry pipelines can collect data from practically any source, process it in flight, and send it to the right destination.
As organizational complexity increases, the telemetry pipeline becomes a crucial tool to manage the volume of data, keep up with architecture changes, and control costs. However, when operating at high scale, managing the various pipeline configurations can be challenging. Writing configurations for a pipeline without the help of a graphical UI makes the configuration management less approachable for an organization.
Examples of telemetry pipelines include open source Fluent Bit, OpenTelemetry Collector, and Chronosphere Telemetry Pipeline, which is based on Fluent Bit.
To be able to reliably maintain and manage infrastructure at scale, users typically turn to GitOps. This post will provide an example of how GitOps can be used with Chronosphere Telemetry Pipeline UI to make GitOps approachable for newcomers and experts alike.
First, I’ll provide a refresher on GitOps concepts.
A refresher on GitOps and GitHub Actions
GitOps has been a buzzword in the industry for quite some time. In layman’s terms, GitOps provides a way for tracking configuration changes to applications and infrastructure through Git via commits and pull requests. The benefit of this approach is that it allows a team to use Git as a source of truth by storing all the configurations of their pipelines in a single place.
There are also security benefits to this approach as GitOps provides a way to audit user actions, track changes, and easily roll back if the need arises.
GitHub Actions is a continuous integration and continuous delivery (CI/CD) platform. GitHub Actions allow you to run workflows when an event occurs in a repository, such as a merge, a pull request, etc.
To run these workflows, Github Actions uses a “runner.” This runner, for all intents and purposes, is similar to starting up your own virtual machine. This means that you can do things such as running a CLI (Command-Line Interface) or even using SSH (Secure Shell) to run commands on the runner.
Chronosphere Telemetry Pipeline and GitOps
While Chronosphere Telemetry Pipeline is built on Kubernetes, you install it in either a Kubernetes cluster or a Virtual Machine. During the installation process, the user deploys a Core Operator (which is a Kubernetes operator) that creates and modifies pipelines. The user also installs a Core Instance, which is the piece that actually runs pipelines.
Pipelines themselves are workloads that can be run as a Deployment, a StatefulSet, or a DaemonSet. The beautiful thing is that after the initial deployment, the user can use the UI to actually build out the pipelines in the pipeline builder. This configuration would include adding new sources, new destinations, and even adding new processing rules (such as enriching logs) or performing a redaction of a sensitive field.
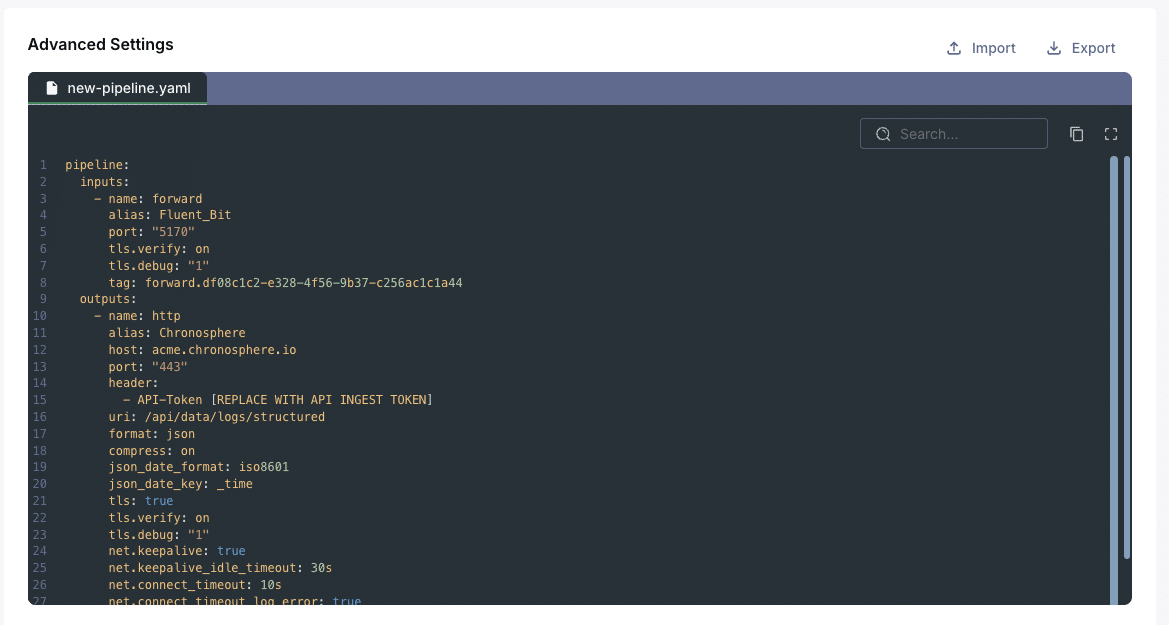
As the user modifies the pipeline configuration in the UI, the advanced settings of the pipeline will also automatically build out the YAML configuration — this can easily be saved, exported, and even used in a GitHub action to apply the pipeline configuration.
From UI to Git: End-to-end workflow
Now that we’ve gotten our refreshers out of the way, let’s work through the process of deploying a telemetry pipeline using GitOps.
Putting all the above concepts together, we can do the following:
- Customize the pipeline configuration in the UI
- Export the resulting YAML file
- Merge the YAML into our working GitHub repository
- Create a GitHub action that would call the Chronosphere Telemetry Pipeline CLI and apply the configuration from the YAML file
Buyer’s Guide: Telemetry Pipelines
Build a smarter telemetry pipeline. Download The Buyer’s Guide to Telemetry Pipelines.
Tutorial: Apply pipeline configs via GitHub Actions
First, we will create and deploy a new pipeline in the web UI. After this pipeline is created, we will handle all modifications to this pipeline through GitHub Actions using a configuration that we will build in the UI.
Note: Before we start, we need to make sure we set up our environment variables in GitHub actions. You will want to set up a variable for the API token for the Chronosphere Telemetry Pipeline API, as well as any additional variables for the pipeline name.
For this tutorial, we will modify an example GitHub action that updates our pipeline configuration on push to the repository. This GitHub action leverages the Chronosphere Telemetry Pipeline CLI and updates the pipeline with the newest configuration file.
For more details on setting up GitHub actions check out this page.
name: CI Workflow

on:
  push:
    branches:
      - main
  pull_request:
    branches:
      - main

jobs:
  build:
    runs-on: ubuntu-latest
    steps:
      - name: Checkout repository
        uses: actions/checkout@v4

      - name: Show branch name
        run: echo "The branch is ${{ github.ref }}"

# Install Calyptia CLI / Docs: https://docs.chronosphere.io/pipeline-cli/install
      - name: Install CLI
        run: curl -sSfl https://raw.githubusercontent.com/calyptia/cli/main/install.sh | bash
        shell: bash

# Set up the API key for Chronosphere Telemetry Pipeline  / Docs: https://docs.chronosphere.io/pipeline-cli/authenticate#generate-an-api-token
      - name: Set up API token
        run: |
          calyptia config set_token '${{ secrets.CTP_SANDBOX_TOKEN }}'
        shell: bash

# Update the configuration file based on the config-file that is in the GitHub repo
# Use a pipeline ID instead of a name to support scenarios where there are multiple pipelines across multiple instances that share the full name

      - name: Update pipeline config
        run: |
           calyptia update pipeline in-fb-out-stdout --config-file pipeline-config/in-fb-out-stdout.yaml
        shell: bash
Configuring and deploying a simple pipeline
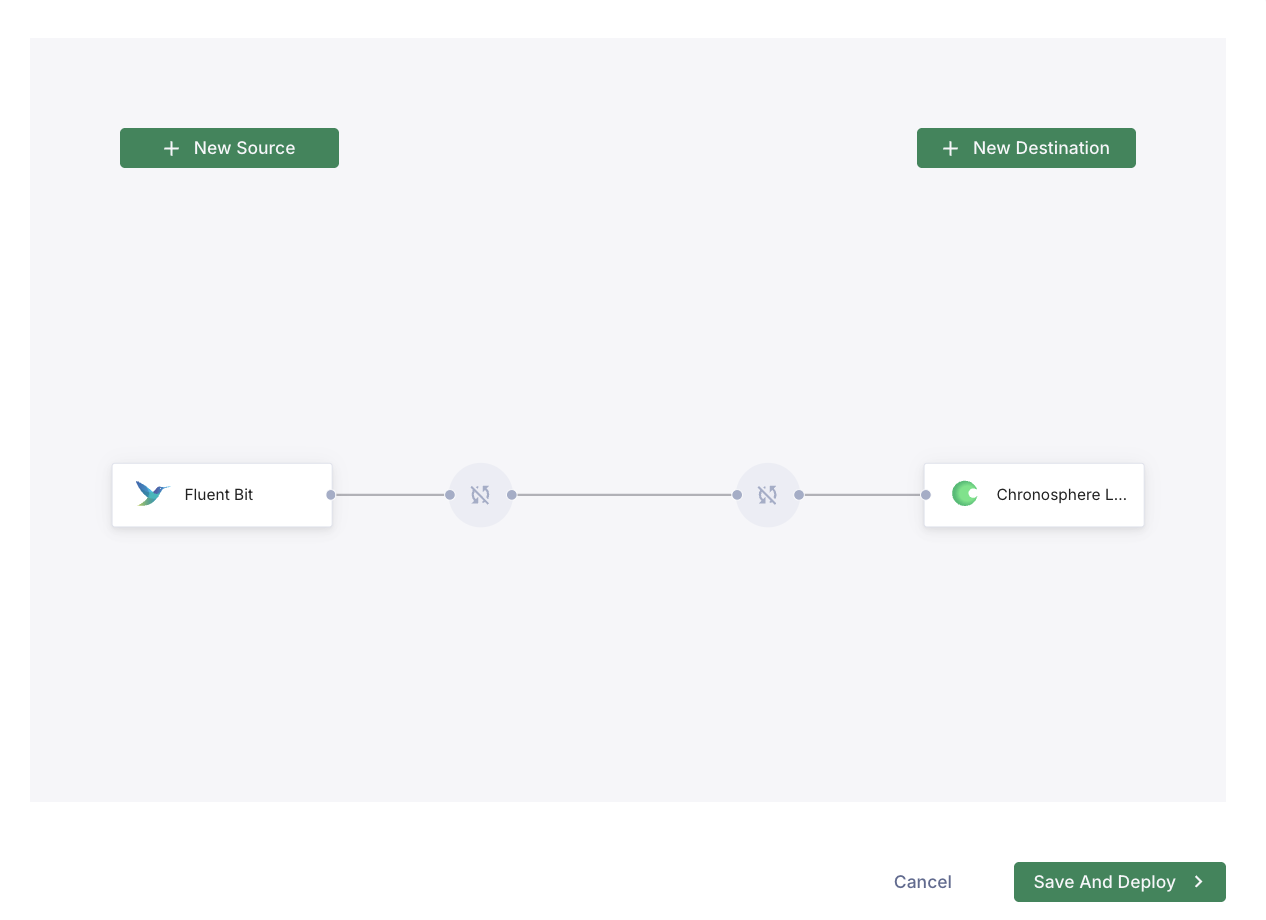
Let’s first configure a simple pipeline and deploy it.
The pipeline I set up collects logs from Fluent Bit and routes them to Chronosphere.
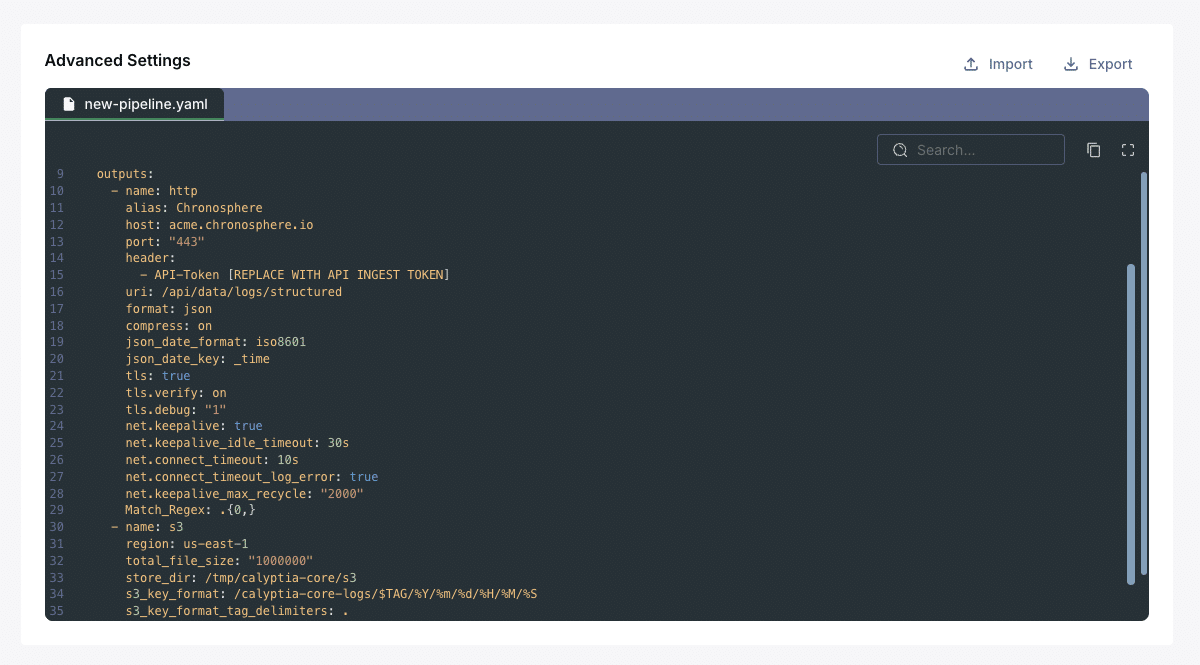
Now, after deploying the pipeline, we have decided that we want to edit the configuration. We want to remove some extra keys (fields) appearing across the logs to increase the amount of valuable data that is sent to Chronosphere.
We also want to add a second destination, sending the data to long-term storage in an Amazon S3 bucket. We can create this configuration in the UI. However, now, instead of “deploying” the changes, we will scroll down and grab the YAML file by clicking the “Export” button, and then merge the resulting YAML into our config repository in GitHub.

We can create this configuration in the UI. However, now instead of “deploying” the changes, we will scroll down and grab the YAML file by clicking the “Export” button, and then merge the resulting YAML into our config repository in GitHub.
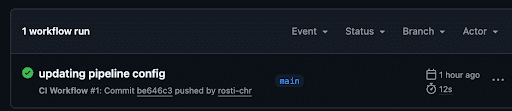
As the file is added to the GitHub repository, the GitHub action triggers the workflow to run on the push.
The Chronosphere Telemetry Pipeline CLI is called, and the configuration is applied to the pipeline.
We just walked through deploying a telemetry pipeline using GitOps.
If you implement this in your own environment, the ability to scale pipelines becomes a collaborative process that is more secure and manageable.
Frequently Asked Questions
What are the main benefits of using GitOps for telemetry pipeline management?
- GitOps makes pipeline configuration scalable and secure by letting teams track changes through Git commits and pull requests, enabling easier auditing and rollback in GitOps.
- Centralizing all pipeline configurations in a Git repository provides a single source of truth, which promotes collaboration and reduces configuration drift.
How does Chronosphere’s Telemetry Pipeline integrate with GitOps workflows?
After deploying Chronosphere’s Telemetry Pipeline, users can build and modify pipeline configurations directly in the UI. Then export these as YAML files for version control in GitHub.
What is the recommended workflow for updating a pipeline configuration using Chronosphere and GitOps?
- Modify your pipeline in the Chronosphere UI to adjust sources, destinations, or processing rules. For power users, it is also possible to directly update the YAML without accessing the UI.
- Export the updated YAML configuration and merge it into your GitHub repository.
- GitHub Actions will trigger, running the Chronosphere CLI to apply your changes in a secure and traceable way.
Buyer’s Guide: Telemetry Pipelines
Build a smarter telemetry pipeline. Download The Buyer’s Guide to Telemetry Pipelines.