")
One of the most important capabilities of an observability platform is alerting. How quickly can you know when something is wrong, so you can rapidly triage and remediate that problem? Chronosphere recently released a new approach to defining alerts called “Monitors,” which gives users more flexibility with alerts and makes them easier to create and manage.
An alert is only useful if it’s seen quickly and by the right on-call team, and that’s where PagerDuty comes in. Many of our customers use Chronosphere and PagerDuty together to:
- Know sooner: Rapidly notify the on-call engineers with alerts from Chronosphere. Chronosphere generates alerts on what you define, meaning notifications about important events are in your hands.
- Cut through the noise: Tailor the severity, team, and notification channel for alerts generated by Chronosphere Monitors based on a wide variety of applications and metadata.
- Triage incidents faster: When you use Chronosphere and PagerDuty together, on-call engineers get the context they need in a seamless fashion, allowing them to quickly jump into remediation mode.
How the integration works
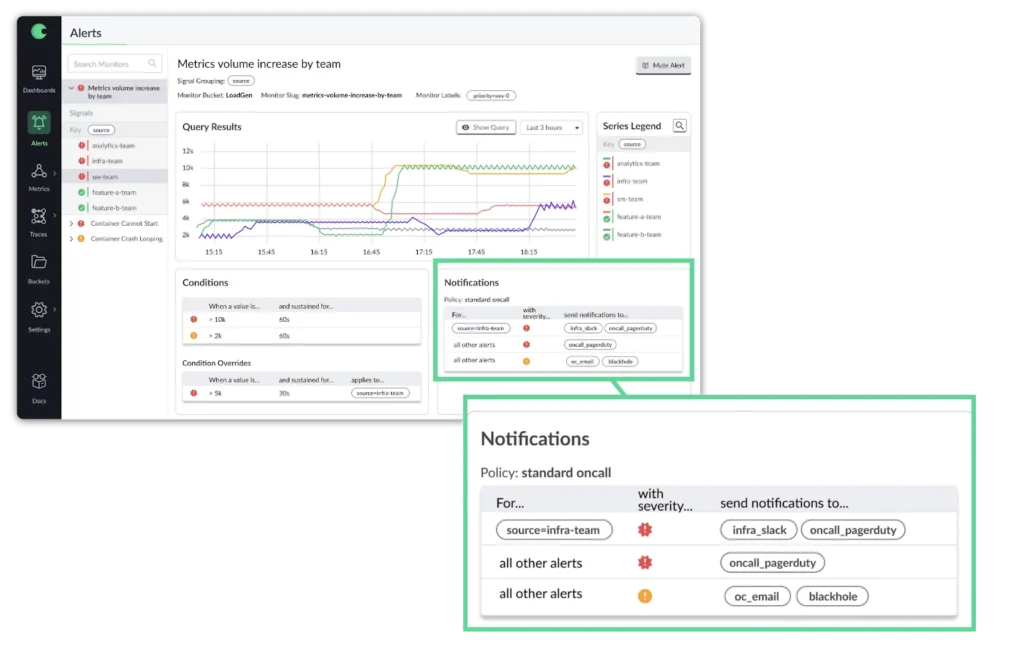
Chronosphere uses the concept of “Monitors” to watch time series data, and generate an alert when that time series violates a specified condition. When an alert triggers it sends a notification to endpoints you specify (called a “notifier”), including PagerDuty. The notification contains the data from the triggering time series and any meta data added to the monitor.
You can trigger notifications to different PagerDuty services, or group alerts into exciting incidents.
Once the time series data returns to a value within the specified condition you can optionally send a “resolved” notification to PagerDuty.
Requirements
- PagerDuty integrations require an Admin base role for account authorization. If you do not have this role, please reach out to an Admin or Account Owner within your organization to configure the integration.
- You need to use Chronosphere (UI or CLI) with a full “Service account” and not a “Restricted Service Account”.
Support
If you need help with this integration, please contact [email protected]
In PagerDuty
There are two ways to integrate with PagerDuty: via global event routing or directly through an integration on a PagerDuty service. Integrate with global event routing if you want to build different routing rules based on the events coming from Chronosphere. Integrate with a PagerDuty service if you don’t need to route alerts from the Chronosphere to different responders based on the event payload.
Integrating with Global Event Routing
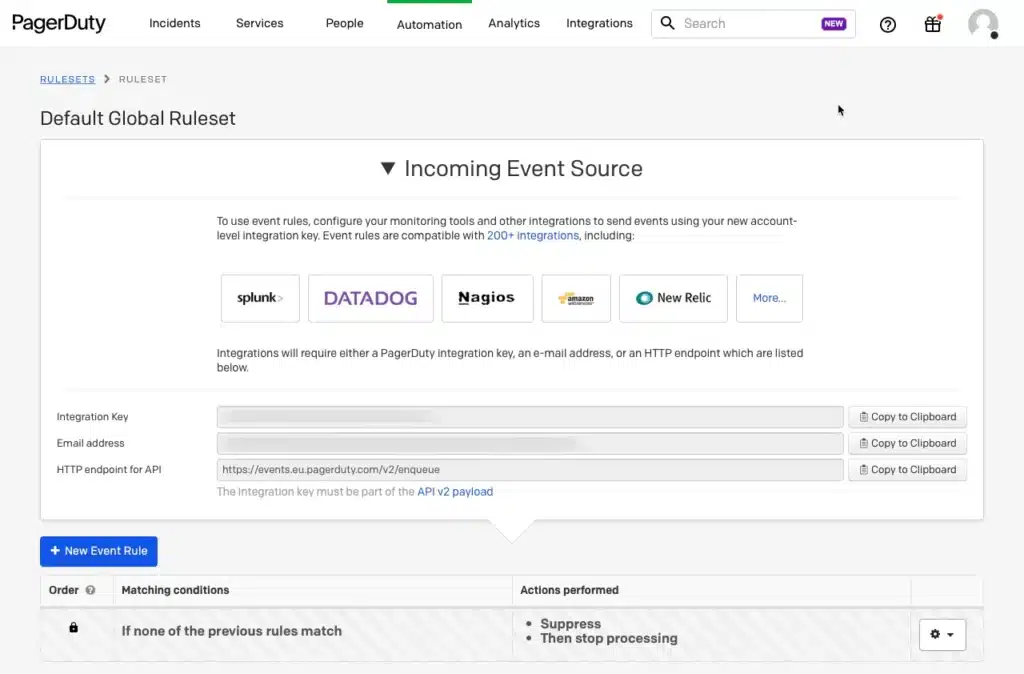
- From the Automation menu, select Event Rules and click your Default Global Ruleset.
- On the Event Rules screen, copy your Integration Key.
- Continue to the “In Chronosphere” section below.
Integrating with a PagerDuty service
- From the Services menu, select Service Directory.
- If you are adding the integration to an existing service, click the name of the service you want to add the integration to. Then select the Integrations tab and click Add a new integration.
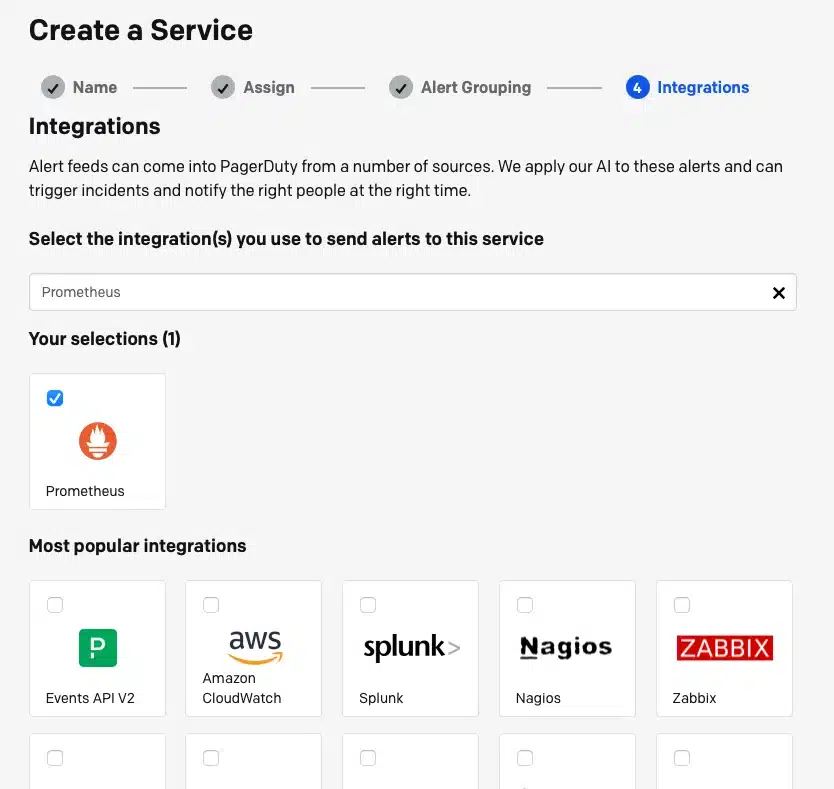
- If you are creating a new service for the integration, read the Configuring Services and Integrations documentation, and follow the steps outlined in the “Create a New Service” section.
- Select “Prometheus”from the Integrations list and add it to the service, this redirects you to the Integrations tab.
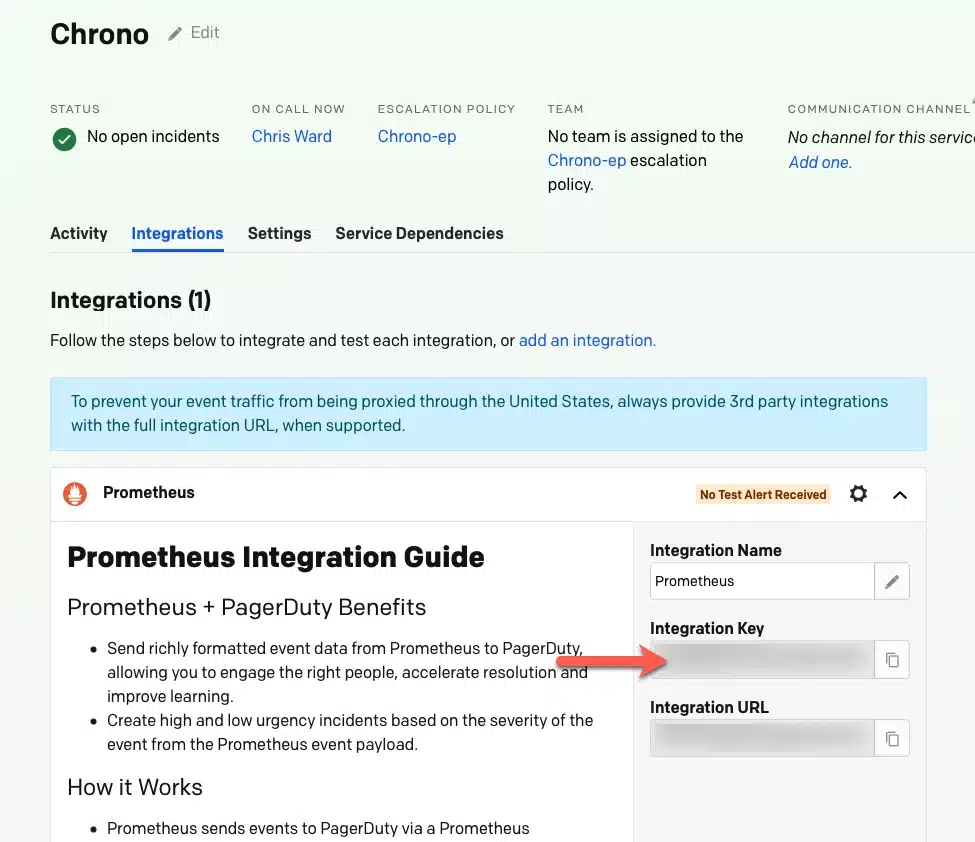
Copy the Integration Key of the service
In Chronosphere
Chronosphere calls the endpoints you can send notifications to a “notifier”. To setup a PagerDuty notifier, open the Services menu in PagerDuty, and click the + New Service button.
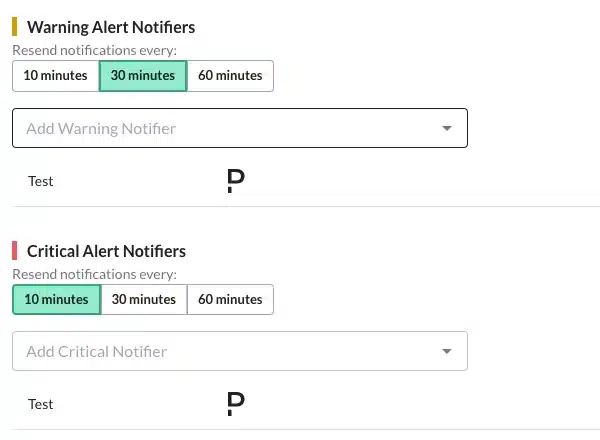
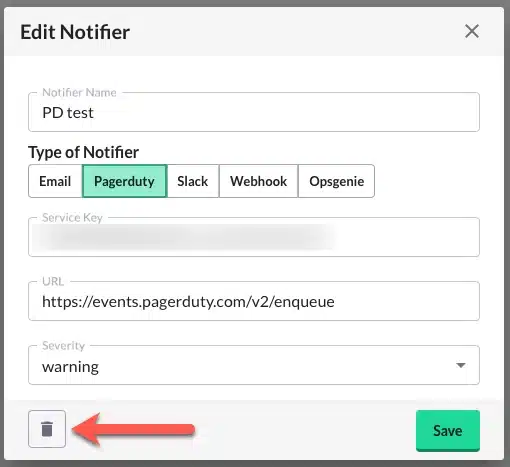
You can create the notifier with the Chronosphere UI from the Settings > Notifiers menu. Click the + Create Notifier button, and select the PagerDuty option. Use the value of the Integration Key for the Service Key field and “https://events.pagerduty.com/v2/enqueue” for the URL field.

You can define the notifier(s) in a YAML file and use Chronosphere’s CLI tool to create them. Use the value of the Integration Key for the service_key field and “https://events.pagerduty.com/v2/enqueue” for the url field. If you want to resolve the alert in PagerDuty when it resolves in Chronosphere, set send_resolved to “true” in the base_config.
api_version: v2 kind: Notifier spec: notifier: name: team-pagerduty slug: team-pagerduty pagerduty: – base_config: # Whether or not to notify about resolved alerts. send_resolved: true service_key: <service_key> url: https://events.pagerduty.com/v2/enqueue severity: critical
Create the notifier using the CLI tool with the chronoctl apply -f file.yaml command.
You can define the notifier(s) in a .tf file and use Chronosphere Terraform provider to create them. Use the value of the Integration Key for the service_key field and “https://events.pagerduty.com/v2/enqueue” for the url field. If you want to resolve the alert in PagerDuty when it resolves in Chronosphere, set send_resolved to true.
resource “chronosphere_pagerduty_alert_notifier” “default” {
name = “Pagerduty Notifier”

# Notifier-specific required configuration
# Detailed definitions can be found at: https://developer.pagerduty.com/docs/events-api-v2/trigger-events/
severity = “info”
url = “https://events.pagerduty.com/v2/enqueue”

send_resolved = true
}
Create the notifier using the provider with the terraform apply command.
When you create a notifier with the Chronosphere CLI tool or Terraform, you can send annotations to PagerDuty containing extra information, such as a direct link to the originating source.
For the CLI tool YAML file add something like the following:
api_version: v2
kind: Receiver
spec:
receiver:
email: null
name: team-pagerduty
opsGenie: null
pagerduty:
– base_config:
send_resolved: true
images:
– src: “https://img.stackshare.io/service/12253/default_c4c3e2b994306c3a6028218ea49291a775fc3275.png”
alt: “Chronosphere”
href: “https://chronosphere.io”
links:
– href: “https://chronosphere.io”
text: “Chronosphere”
– href: “https://chronosphere.io”
text: “Chronosphere”
service_key: R02EU5OAWHP67AENFIGGBOO580OO2CXS
severity: critical
url: https://events.pagerduty.com/v2/enqueue
slack: null
webhook: null
And for the Terraform provider:
image {
# src is required for every image
src = “https://img.stackshare.io/service/12253/default_c4c3e2b994306c3a6028218ea49291a775fc3275.png”
alt = “Chronosphere”
href = “”
}
link {
# href is required for every link
href = “https://chronosphere.io/”
text = “some text”
}
Chronosphere uses “Buckets” as a container for storing monitors, dashboards, and metrics. Every monitor, dashboard, and metric must belong to exactly one bucket. When you create (or edit) a bucket, you define the notifier policies, and there you can select the PageDuty notifier(s) you created.
How to uninstall
To remove the Chronosphere notifier, you first need to change the notification policy of any Buckets that use it.
To delete with the UI, then open the Settings > Notifiers menu, click the notifier, and the delete icon.
To delete with the terraform provider, remove the notifier definition from the TF file and use the terraform apply command.
To delete with the CLI tools, use the chronoctl delete notifier -n notifier-name command.